 Pin It
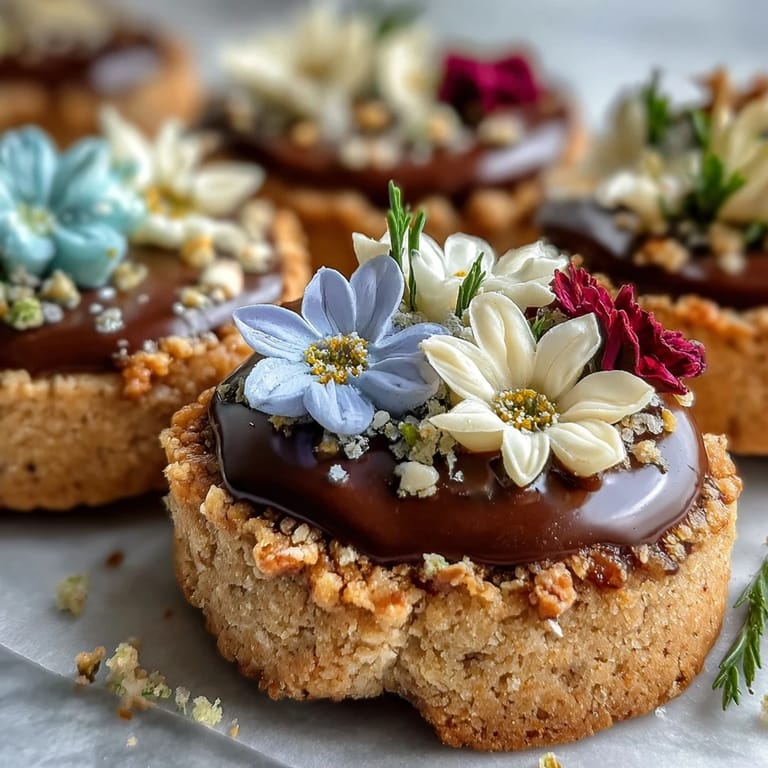
 There's something about the quiet of early morning that makes cookie decorating feel almost meditative. Years ago, I was stress-baking before a friend's baby shower, piping royal icing onto butter cookies at 6 AM, when my roommate shuffled into the kitchen and just watched in silence. She didn't say anything—just grabbed a cup of coffee and sat there while I worked, and somehow that moment became the whole reason I keep making these delicate, flower-topped sugar cookies. They taste buttery and tender, but really, they're an excuse to slow down and create something beautiful with your own hands.
I'll never forget the afternoon I made these for my cousin's baby shower and one of her guests—a woman I'd never met—asked for the recipe while actively crying over the beauty of the presentation. She told me later she'd been going through a rough time, and watching something so delicate and intentional being created had genuinely comforted her. That's when I understood these cookies weren't about impressing people; they were about giving them a moment of softness.
Ingredients
- All-purpose flour (2 1/2 cups): The foundation of structure—make sure it's measured by spooning and leveling, not scooping, or your cookies might spread too much.
- Unsalted butter (3/4 cup, softened): Softness matters here; cold butter won't cream properly and you'll lose that light, airy crumb that makes these special.
- Granulated sugar (3/4 cup): This creams with the butter to trap air and create tenderness; don't skip this step or cut back.
- Egg (1 large): Room temperature works best because it blends evenly without breaking the emulsion of butter and sugar.
- Pure vanilla extract (2 teaspoons): The quality matters—pure extract tastes noticeably better than imitation, especially in something this simple.
- Baking powder (1/2 teaspoon): Just enough to give the cookies a gentle lift without making them cakey.
- Salt (1/4 teaspoon): Even in sweets, salt enhances flavor and balances the sweetness.
- Powdered sugar (3 cups, sifted): Sifting prevents lumps that would ruin your smooth icing—this is non-negotiable.
- Egg whites (2 large or 1/4 cup pasteurized): Use pasteurized if you prefer, and beat them until frothy before adding sugar for the silkiest icing texture.
- Pastel food coloring: Gel colors give deeper, more beautiful pastels than liquid food coloring without thinning the icing.
Tired of Takeout? 🥡
Get 10 meals you can make faster than delivery arrives. Seriously.
One email. No spam. Unsubscribe anytime.
Instructions
- Gather and Measure Your Ingredients:
- Set everything out before you start—this is especially important for cookies because creaming butter and sugar has a specific window where it works best. Room temperature ingredients blend together far more smoothly than cold ones pulled straight from the fridge.
- Mix Your Dry Base:
- Whisk together the flour, baking powder, and salt in a bowl, making sure the baking powder is evenly distributed so you don't get pockets of risen dough. This early mixing prevents lumps later and ensures every cookie rises the same way.
- Cream Butter and Sugar Until Light:
- Using an electric mixer on medium speed, beat the softened butter and granulated sugar together for about 3 minutes until the mixture looks pale and fluffy like clouds. You'll notice the texture change quite visibly—this step is where the magic happens for tender cookies.
- Add the Egg and Vanilla:
- Beat in the egg one at a time, then add the vanilla, mixing until everything is well incorporated and the mixture looks smooth. Don't rush this or the egg won't emulsify properly with the butter.
- Combine Wet and Dry:
- Pour the flour mixture into the butter mixture gradually while the mixer is running on low speed, stopping just as the dough comes together. Overmixing at this point develops gluten and makes cookies tough instead of tender.
- Chill Your Dough:
- Form the dough into a flat disc, wrap it tightly in plastic wrap, and refrigerate for at least 1 hour—overnight is even better. This resting time lets the gluten relax and the flavors develop, plus it makes the dough much easier to roll without sticking.
- Preheat and Prepare:
- Set your oven to 350°F (175°C) and line your baking sheets with parchment paper while you're rolling out the dough. This keeps everything from sticking and ensures even, gentle heat distribution.
- Roll and Cut with Care:
- On a lightly floured surface, roll the dough to about 1/4-inch thickness—use a ruler if you're unsure, as consistent thickness means even baking. Cut shapes with floured cookie cutters, then gently transfer each cookie to the prepared sheets about 1 inch apart.
- Bake Until Golden:
- Bake for 10 to 12 minutes until just the edges turn golden—the centers should still look slightly underdone, as they'll continue cooking on the pan. This is the secret to chewy centers with crispy edges.
- Cool Completely:
- Transfer cookies to a wire rack and let them cool entirely before decorating—this usually takes about 15 to 20 minutes. Decorating warm cookies causes the icing to slide right off.
- Beat Egg Whites for Icing:
- In a very clean, grease-free bowl, beat the egg whites (or pasteurized whites) on high speed until they're frothy and hold soft peaks. Any trace of yolk or fat will prevent the whites from whipping properly.
- Build Your Icing:
- Gradually add the sifted powdered sugar to the egg whites while beating, then add your vanilla or almond extract, beating until stiff peaks form and the icing is glossy and thick. This takes about 5 minutes of continuous beating.
- Color and Adjust Consistency:
- Divide your icing into small bowls and add a tiny drop of gel food coloring to each, stirring until you reach your desired pastel shade. For flooding larger areas, thin with a drop or two of water; for detailed piping, add a tiny pinch of extra powdered sugar.
- Pipe Your Flowers:
- Using piping bags fitted with small round or petal tips, pipe delicate flower designs, leaves, and details onto the cooled cookies, working in whatever way feels natural to you. The beauty comes from imperfection, so don't stress about making them look identical.
- Let Everything Dry:
- Leave the decorated cookies on the counter for at least 2 to 3 hours, or overnight, until the icing hardens completely and forms a smooth, crisp shell. This is when they become truly shelf-stable.
 Pin It
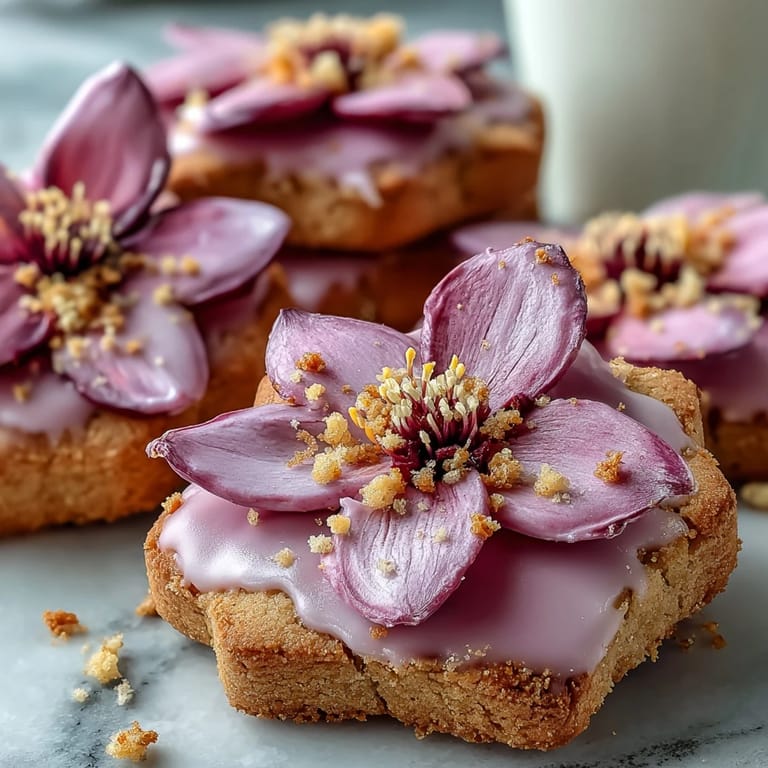
 My neighbor still has a photo from her daughter's first birthday party where these cookies are scattered across the dessert table, looking almost too pretty to eat. I think she left them out longer than planned because people kept asking who made them, and each time she said my name, there was this tiny note of pride in her voice—like she was sharing a piece of artistry, not just a treat. That's the unexpected gift of this recipe: it makes people feel special not because the cookies are complicated, but because someone took time to make something beautiful for them.
The Secret Behind the Tender Crumb
The real magic in these cookies comes from the ratio of butter to sugar and the way you cream them together. I spent years making cookies that turned out cakey or too crispy before I realized I was either not creaming long enough or using cold ingredients. When you beat room-temperature butter and sugar for a full three minutes, you're incorporating air bubbles that expand in the oven and give you that delicate, almost melt-in-your-mouth texture. It sounds simple, but it's the difference between a good cookie and one that makes people close their eyes when they bite into it.
Royal Icing: The Glossy Finish
Royal icing intimidates a lot of home bakers, but honestly, it's forgiving once you understand what's happening. The egg whites trap air when beaten, and the powdered sugar stabilizes that air, creating a meringue that dries to a smooth, hard shell. The moment you add the sugar gradually instead of all at once, you'll see the transformation—the mixture goes from frothy to glossy to stiff, and you'll know immediately when it's right. I stopped overthinking it when I realized that even slightly imperfect icing looks charming on these delicate cookies.
Decoration Ideas and Storage
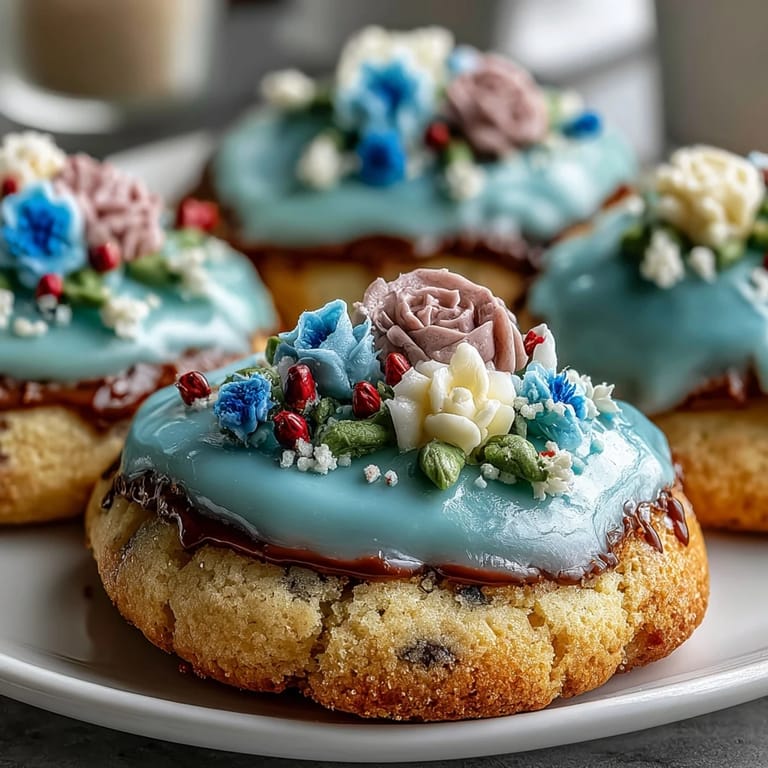
One of the joys of this recipe is how customizable it becomes once the cookies are baked and cooled. You can pipe tiny blossoms, create ombré effects by layering different shades, add edible pearls or shimmer dust while the icing is still wet, or keep it simple with single-color flowers. I've even seen these decorated with tiny piped dots that look like stamens in the center of flowers—there's no wrong way to do it as long as you let the icing dry completely before stacking or packaging.
- Store decorated cookies in an airtight container with parchment between layers to prevent them from sticking together.
- These keep beautifully for up to five days at room temperature, making them perfect for advance preparation before celebrations.
- You can also freeze unbaked dough discs for up to two months, then thaw and roll out whenever you need fresh cookies.
 Pin It
 These cookies have become my answer to almost every spring celebration, every moment that calls for something beautiful and gentle. Make them and watch how people react—there's something about homemade, hand-decorated cookies that store-bought treats just can't match.
Recipe FAQs
- → What ingredients ensure tender sugar cookies?
Using softened unsalted butter combined with sugar and a touch of vanilla extract helps create a tender, flavorful cookie base.
- → How do I achieve the perfect royal icing consistency?
Gradually add powdered sugar to beaten egg whites until stiff peaks form; adjust with water for flooding or more sugar for thicker piping.
- → Can I prepare the floral decorations in advance?
Yes, royal icing flowers can be piped on parchment and allowed to dry fully before transferring onto cookies.
- → What baking tips help avoid spreading cookies?
Chilling the dough for at least an hour and using parchment-lined baking sheets keeps cookies from spreading too much.
- → How should I store these decorated cookies?
Place them in an airtight container at room temperature for up to five days to maintain freshness and decoration integrity.