 Pin It
 I discovered cake pops at a friend's birthday party where they were arranged like tiny edible planets on a stand, and I became instantly obsessed with how magical they looked under the kitchen lights. That night, I decided I needed to master them, but my first attempt was a sticky disaster that taught me patience is everything. Years later, when I learned about zodiac-themed desserts, I knew Pisces cake pops had to be my next adventure, with swirling galaxy colors that felt as dreamy as the water sign itself. The moment I dipped my first pop into teal-colored chocolate and watched it transform into something otherworldly, I understood why people get so excited about these little treats.
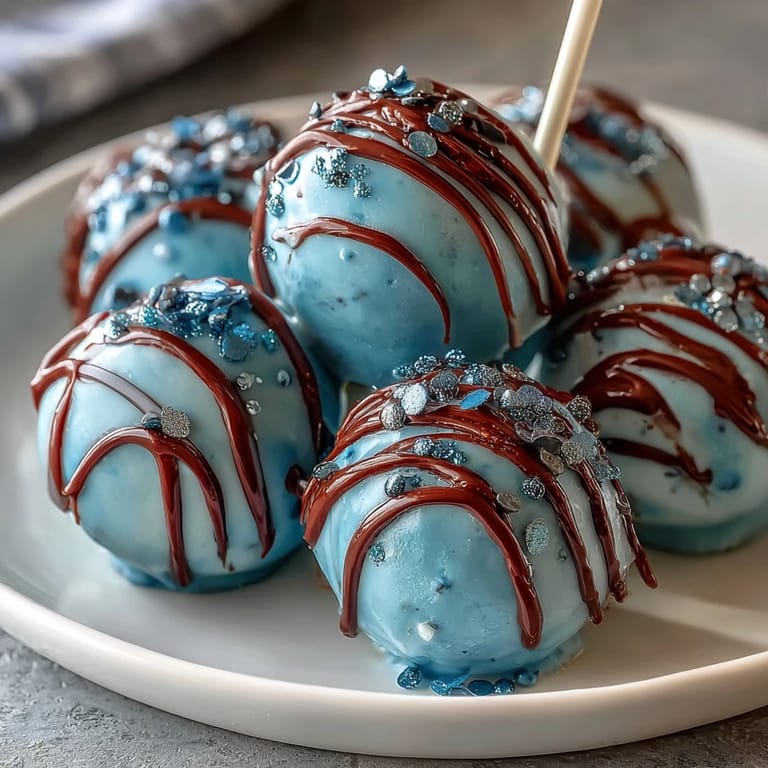
I'll never forget making these for my sister's Pisces-themed dinner party where she insisted on zodiac everything, and I was nervous the galaxy swirls wouldn't look intentional enough. But when the edible glitter caught the candlelight as she brought them to the table, everyone gasped, and suddenly my kitchen anxiety melted away. That moment of watching people light up over something I created with my own hands reminded me why I love baking in the first place.
Ingredients
- Vanilla cake mix (or homemade equivalent): The base matters less than you'd think, but quality vanilla creates a neutral canvas for the frosting and chocolate to shine.
- Unsalted butter, softened to room temperature: Cold butter will fight you during mixing, so pull it out at least an hour before you start.
- Powdered sugar: Sifting it first prevents lumpy frosting that'll make your cake balls gritty instead of smooth.
- Milk and vanilla extract: These additions make the frosting taste like actual dessert instead of pure sugar, which sounds obvious but changes everything.
- White chocolate or candy melts: I've learned candy melts are actually superior here because they don't require tempering and hold their color better than chocolate.
- Gel food coloring in navy, purple, teal, black, and pink: Gel coloring won't thin out your chocolate like liquid coloring does, which means you control the consistency perfectly.
- Edible glitter: Buy the good stuff from specialty baking stores; the cheaper versions sometimes taste metallic and don't shimmer as beautifully.
- Lollipop sticks: Have a few extra on hand because you'll inevitably break one or two during the dipping process.
Tired of Takeout? 🥡
Get 10 meals you can make faster than delivery arrives. Seriously.
One email. No spam. Unsubscribe anytime.
Instructions
- Bake your cake and let it cool completely:
- Follow the package directions, then give the cake time to reach room temperature on a wire rack. Warm cake crumbs won't hold together properly, so this step is your foundation for success.
- Crumble the cake into fine pieces:
- Your hands work better than any tool here, breaking everything down until it resembles coarse breadcrumbs. This texture is what lets the frosting bind everything together later.
- Make the frosting by beating butter until creamy:
- This takes about a minute and lightens the butter, which helps everything blend smoothly. Add powdered sugar gradually so you don't send clouds of it everywhere.
- Mix in milk, vanilla, and salt:
- Beat until the frosting becomes fluffy and spreadable, which takes another minute or two. Taste it now and decide if you want to add that almond or orange extract mentioned in the notes.
- Combine frosting and cake crumbs gradually:
- Add frosting a little at a time, mixing between additions until the mixture holds together when you squeeze it. Too dry and the balls crack, too wet and they won't set properly.
- Roll into 1.5-inch balls with your hands:
- This is meditative work, and slightly warm hands help the mixture compress into smooth spheres. Wipe your hands with a damp cloth between batches to prevent sticking.
- Chill the cake balls for at least one hour:
- This is non-negotiable because cold cake balls won't absorb the chocolate coating or fall apart during dipping. Some people overnight them, which I've found makes them even more stable.
- Melt white chocolate in a microwave-safe bowl:
- Use 30-second bursts and stir between intervals to prevent scorching; chocolate burns fast and quietly. You want it smooth and pourable but not hot, which would cook the frosting inside.
- Divide melted chocolate into bowls and tint with gel coloring:
- Add coloring drop by drop because these pigments are concentrated and you can always add more. Mix thoroughly so the color distributes evenly and doesn't streak.
- Anchor each stick with a chocolate dip:
- Dip the stick tip into plain melted chocolate first, then insert it halfway into a cold cake ball. This acts like glue, preventing your stick from spinning loose during the actual dipping.
- Dip each cake pop into colored chocolate with a gentle swirl:
- Don't overthink the galaxy pattern; natural swirls look more authentic than forced designs. Let excess drip back into the bowl for a neat finish.
- Stand the pops upright while the coating sets:
- A styrofoam block, pint glass filled with rice, or even a mug works for this. The coating needs to set slightly before you add glitter so it sticks.
- Add edible glitter while the chocolate is still tacky:
- This is your moment to make them magical, so don't skip this step or they'll look flat. Sprinkle or press gently so the shimmer catches light from every angle.
- Let them cure fully before serving:
- Room temperature works fine, though the fridge speeds things up if you're in a hurry. They're ready when the chocolate shell feels completely firm to the touch.
 Pin It
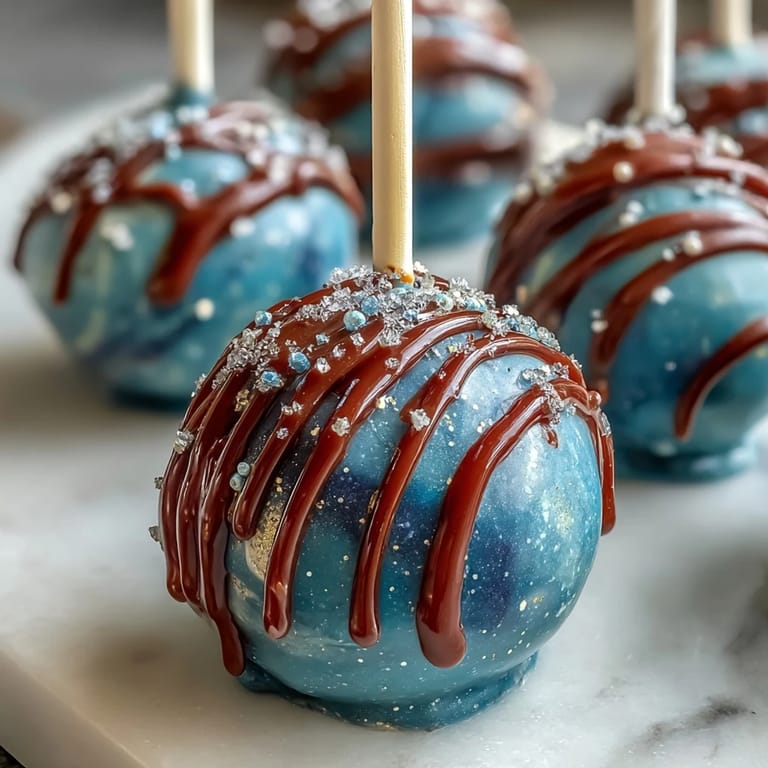
 There's something almost meditative about standing in my kitchen with a dozen little cake pops waiting to be transformed, each one representing the promise of something beautiful. When I finally dust them with glitter and see them catch the light like tiny edible stars, I'm reminded that the simplest ingredients and a little patience can create genuine magic.
The Magic of Swirling Colors
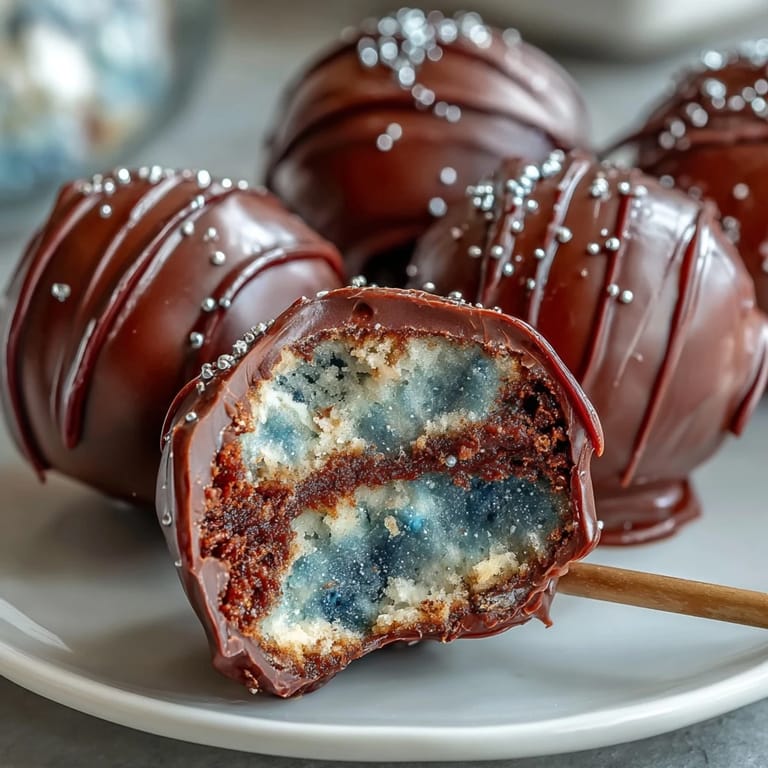
The galaxy effect isn't something you need to overthink or perfect; honestly, the most beautiful swirls happen when you relax and let the colors blend naturally. I learned this after my first batch where I was so focused on creating perfect patterns that I overthought every dip and ended up with muddy brown pops instead of dreamy galaxies. The real trick is dipping the pop into one color, giving it a gentle twist, then dipping it slightly lower into a second color so they marry together on the surface. Think of it like watching watercolor paint blend on wet paper, because that's essentially what's happening here.
Storing and Serving Your Creations
These cake pops thrive in the refrigerator, where they stay fresh for about five days in an airtight container. I've found that storing them in a cool place keeps the chocolate shell snappy and the frosting inside perfectly moist, unlike room temperature storage where they can get slightly sweaty and the chocolate becomes soft. The fridge also gives you flexibility because you can make them days ahead for parties without stress.
Personalization and Pisces Touches
Beyond the galaxy colors, you have endless ways to make these feel specifically Pisces-inspired and uniquely yours. Think about your favorite color combinations within the galaxy theme, whether that's deeper purples and teals or lighter lavenders mixed with pale pink. Consider what makes your kitchen feel special and what flavors you naturally gravitate toward.
- Try adding a drop of almond or orange extract to the frosting for a flavor twist that elevates the whole experience.
- Use fish-shaped sprinkles or tiny fondant fish to double down on the Pisces symbolism before the chocolate sets.
- Save these for meaningful moments, whether that's celebrating a Pisces friend's birthday or treating yourself to something magical on a random Tuesday.
 Pin It
 Making these Pisces-themed galaxy cake pops taught me that magic exists in the smallest kitchen moments, where patience and a little color transform simple ingredients into something memorable. I hope your kitchen fills with the joy that mine does every time I make these shimmering little treats.
Recipe FAQs
- → How do I achieve the galaxy swirl effect on cake pops?
Use gel food coloring to tint white chocolate in several galaxy-inspired hues. Dip and swirl the pops carefully while the coating is still liquid to create marbled galaxy patterns.
- → Can I prepare the cake pops ahead of time?
Yes, after dipping and decorating, store the cake pops in an airtight container in the fridge for up to 5 days to keep their freshness.
- → What type of edible glitter works best for these pops?
Opt for food-safe silver, blue, or iridescent edible glitter to complement the galaxy colors and add a sparkling finish without overpowering flavors.
- → Are there any tips for preventing the coating from cracking?
Ensure the cake balls are well chilled before dipping and avoid extreme temperature changes by allowing pops to set at room temperature or gently in the fridge.
- → Can I customize the flavor of the frosting?
Absolutely! Adding a few drops of orange or almond extract can enhance the frosting's richness and add a unique note to the pops.
- → What tools are essential for making these cake pops?
Key tools include mixing bowls, a hand or stand mixer, parchment paper, microwave-safe bowls for melting chocolate, lollipop sticks, and a styrofoam block or stand to hold the pops upright during setting.