 Pin It
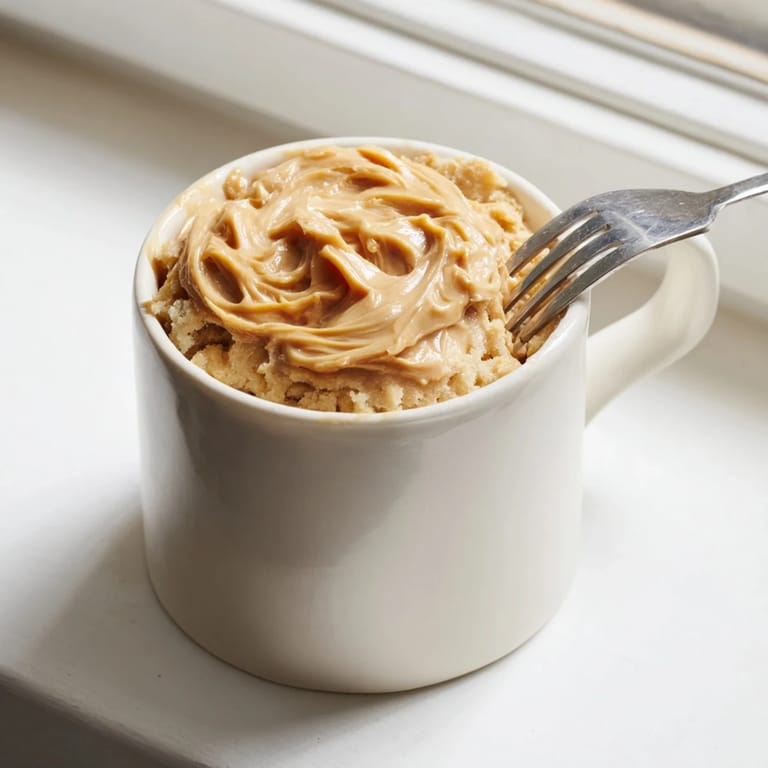
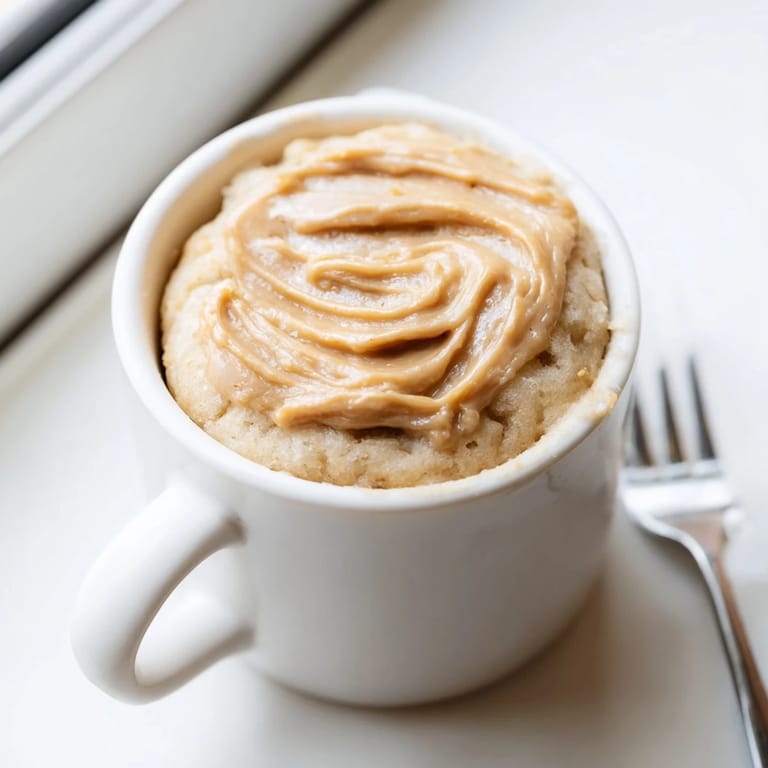
 There's something magical about standing in front of the microwave at 10 PM, craving something warm and sweet but too tired to bake. I discovered this mug cake on a random Wednesday when I had exactly three minutes and zero patience for a full dessert production. The first time I mixed it together in an oversized coffee mug, I genuinely didn't expect it to work, but when it came out fluffy and impossibly rich, I became that person who makes it constantly. Now it's my secret weapon whenever I need comfort food that doesn't require planning.
I made this for my roommate during a late-night study session, and watching her face light up when she tasted how fluffy it was—when she'd only given me three minutes to work with—made me realize this wasn't just a shortcut dessert. It became a ritual we'd share when things felt overwhelming, a tiny moment of kindness that took less time than making tea. That's when I stopped seeing it as lazy baking and started seeing it as smart cooking.
Ingredients
- Creamy peanut butter: This is your flavor foundation, so don't skimp or use the natural stuff with separated oil unless you want it less sweet and more intense. Two tablespoons gives you that rich, almost fudgy depth.
- Unsalted butter, melted: The butter and peanut butter together create a moisture-rich crumb that keeps the cake from being dense or dry despite the speed.
- Large egg: One egg binds everything and contributes to the fluffy rise, so use a room-temperature egg if possible for better mixing.
- Milk (dairy or non-dairy): This keeps the batter pourable and the finished cake tender; almond milk works beautifully if you're avoiding dairy.
- Vanilla extract: Just half a teaspoon brightens the peanut butter without overpowering it.
- All-purpose flour: Measure by spooning and leveling, not scooping, or you'll pack too much flour and end up with a dense cake.
- Granulated sugar: Two tablespoons gives sweetness without making it a candy, allowing the peanut butter to shine.
- Baking powder: A quarter teaspoon is all you need in this tiny quantity; it's what makes the magic happen in the microwave.
- Salt: A pinch grounds everything and prevents the sweetness from becoming one-note.
Tired of Takeout? 🥡
Get 10 meals you can make faster than delivery arrives. Seriously.
One email. No spam. Unsubscribe anytime.
Instructions
- Blend the base:
- Pour the peanut butter and melted butter into your mug and stir until smooth and glossy. You want no streaks of separated peanut butter, as this ensures even distribution of flavor throughout the cake.
- Add the wet ingredients:
- Crack the egg into the mug and add the milk and vanilla, then whisk everything together with a fork until it looks like a pale, homogeneous batter. This takes about thirty seconds and it's okay if it doesn't look totally perfect yet.
- Fold in the dry ingredients:
- Sprinkle the flour, sugar, baking powder, and salt over the top and stir gently just until you don't see white streaks of flour anymore. Overmixing develops gluten and makes the cake tough, so stop as soon as it comes together.
- Microwave with confidence:
- Microwave on high for 60 to 75 seconds—the exact time depends on your microwave's power, so watch for the cake to rise above the rim of the mug and for the center to look set but still slightly soft. It will continue cooking slightly as it cools.
- Rest before eating:
- Let it sit for one to two minutes so the crumb sets and the mug becomes less dangerously hot. This also lets the flavors settle and the cake firms up just enough to taste perfect.
 Pin It
 My favorite version of this memory involves my partner at midnight, both of us in our worst moods, and somehow this ridiculous mug cake turned the whole evening around. It became the thing we made when words felt too hard, when we needed something immediately and wanted it to taste like we cared. Food doesn't always need to be complicated to feel like love.
The Magic of Single-Serve Baking
There's a real freedom in baking for one person. You're not dividing recipes or worrying about portions; you're not cleaning eight bowls and a stand mixer. Mug cakes taught me that sometimes the simplest dessert is the most satisfying because it respects your time and your actual appetite. I've since learned that microwave baking is faster than preheating an oven, and when you're standing there wanting chocolate at midnight, faster is everything.
Customizing Your Peanut Butter Moment
The beauty of this recipe is that it's a stage for whatever you're craving that day. I've topped it with everything from a spoonful of chocolate chips stirred in before microwaving to a drizzle of honey after it cooks to a small scoop of vanilla ice cream melting into the warm cake. Once I spread a thin layer of jam on the inside of the mug before pouring the batter, which created this unexpected sweet pocket throughout.
Why This Works When Nothing Else Seems To
This cake exists in the gap between the craving and the satisfaction, and that gap is only three minutes. It's not a compromise dessert that you make when you can't be bothered to bake properly; it's the right answer when you want something warm, sweet, and real right now. The peanut butter makes it feel indulgent, the egg makes it feel legitimate, and the speed makes it feel possible on even your worst days.
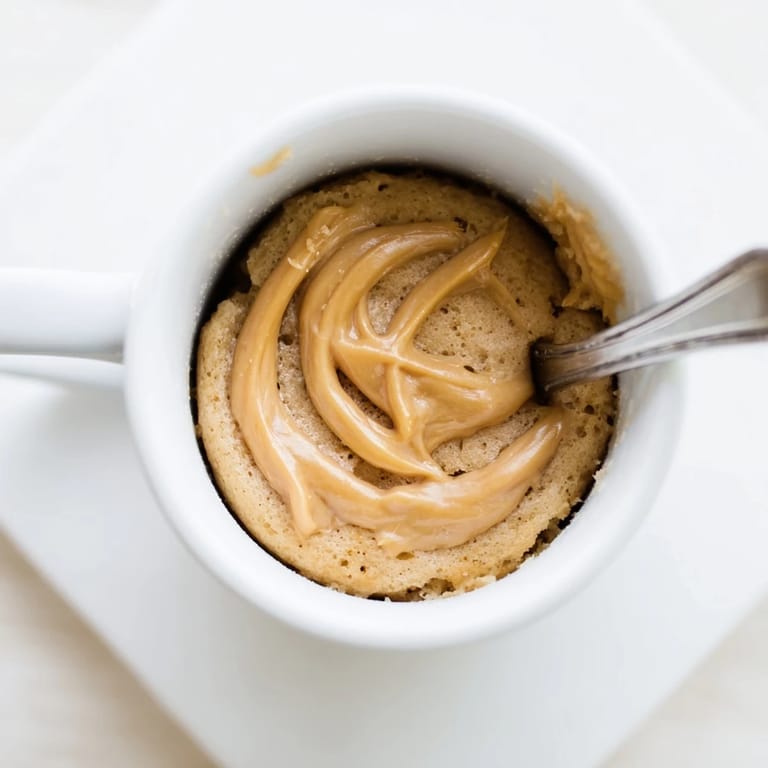
- Serve it right in the mug while it's still warm so you get that perfect balance of fluffy cake and slightly warm peanut butter flavor.
- If you want it less sweet, use natural peanut butter and reduce the sugar to one and a half tablespoons without affecting the texture.
- Keep these ingredients on hand because sometimes the best moments are the ones you didn't plan for.
 Pin It
 This tiny cake has a way of showing up exactly when you need it, turning a rough moment into something small and sweet and manageable. Make it tonight.
Recipe FAQs
- → Can I use a dairy-free milk?
Yes, almond or oat milk works well, maintaining the creamy texture without dairy.
- → How do I avoid overcooking the cake?
Microwave only for 60–75 seconds and watch for the cake rising; overcooking can dry it out.
- → Can I add toppings to enhance flavor?
Absolutely, chocolate chips, honey drizzle, or a scoop of ice cream add extra indulgence.
- → Is there a gluten-free option?
Use a 1:1 gluten-free flour blend instead of all-purpose flour to make it gluten-free.
- → What tools are needed for preparation?
A microwave-safe mug and a fork or small whisk are all you need for mixing and cooking.