 Pin It
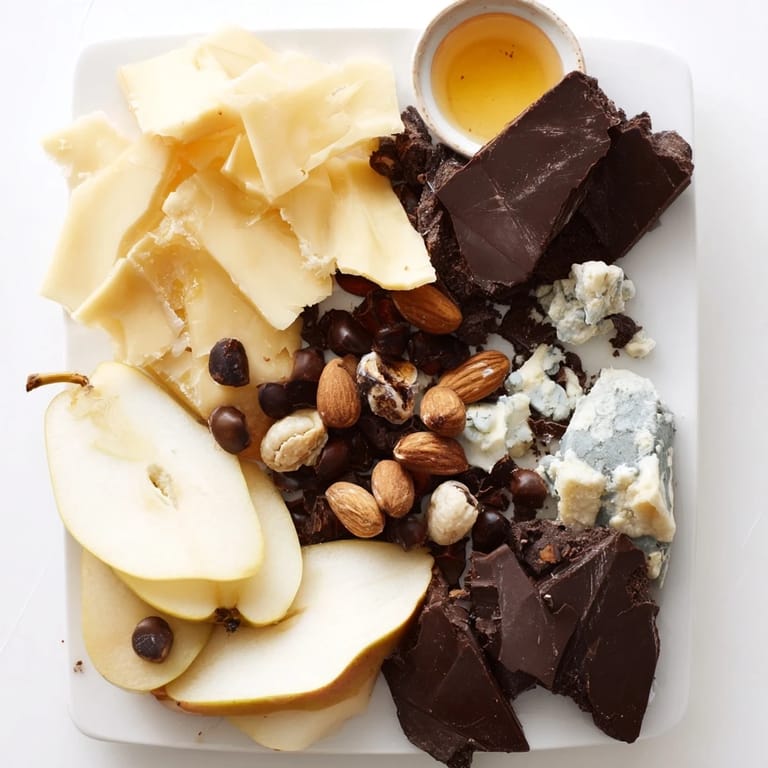
 I still remember the first time I gathered friends around a crackling fireplace with a board of aged cheeses and dark chocolate. It wasn't planned as anything fancy—just a quiet November evening when someone suggested we needed something to warm our hands and hearts. I pulled together what I had: chunks of sharp cheddar I'd been saving, a wedge of creamy gouda, and some dark chocolate that had been calling my name. By the end of the night, that simple arrangement had sparked the kind of conversation that only happens when good food and good company collide. Now, whenever the weather turns cold, I find myself recreating that moment.
I made this for my sister's book club last winter, and something magical happened. A woman who claimed she didn't like dark chocolate found herself reaching for it again and again, pairing it with the blue cheese in ways I hadn't even considered. By the end of the night, she was asking for the brand name. That's when I realized this isn't just about the individual ingredients—it's about how they give each other permission to shine.
Ingredients
- Aged cheddar, 200g, cut into large chunks: The sharp, nutty notes of aged cheddar provide the savory anchor that makes the chocolate taste even more decadent. Cut it rough and irregular—it looks more inviting and breaks into perfect bite-sized pieces naturally
- Aged gouda, 150g, broken into wedges: Gouda has this buttery sweetness that bridges the gap between cheese and chocolate beautifully. The slight caramel notes in well-aged gouda are what you're after here
- Blue cheese, 150g, crumbled or chunked: This is the wild card that makes people pause and really think about flavor. The funky, salty intensity next to dark chocolate creates a moment of delicious confusion
- Dark chocolate, 120g, 70% cocoa or higher, broken into pieces: Don't go darker than 85% unless you want to overwhelm the cheese pairing. The 70% sweet spot lets the chocolate sing without stealing the show
- Chocolate-covered almonds, 100g: These add crunch and texture—a reminder that this platter is meant to be explored with all your senses, not just tasted
- Chocolate-dipped dried figs, 80g: Figs have this honeyed intensity that makes them feel luxurious. The chocolate coating keeps your fingers from getting sticky, which matters more than you'd think
- Chocolate truffles, 60g: Choose truffles that complement your chocolate pieces—maybe ganache, maybe something with sea salt. These are your indulgence quota
- Baguette, 1 small, sliced: Thin enough to not compete with the other flavors, thick enough to have some structure. Toast it lightly if you want it to last on the board without getting stale
- Roasted walnuts or pecans, 80g: Toasted nuts add earthiness and a satisfying crunch. Toast them yourself if you can—store-bought roasted nuts sometimes taste stale
- Pear, 1, sliced: The sweetness and slight tartness refresh your palate between bites. Slice just before serving and toss with a tiny squeeze of lemon to prevent browning
- Apple, 1, sliced: Granny Smith or Honeycrisp work best—you want something that won't turn mealy within minutes of slicing
- Honey, 2 tbsp: Serve in a small bowl alongside. It's not really for drizzling on everything—it's for those moments when you want to dip a piece of cheddar into liquid gold
- Whole milk, 500ml: Full-fat milk creates the velvety cocoa you're after. Don't skip this for lower-fat versions—the richness is the whole point
- Dark chocolate, 100g, chopped: Chop it smaller than the board chocolate pieces so it melts quickly and evenly into the milk
- Unsweetened cocoa powder, 1 tbsp: This deepens the chocolate flavor without adding sweetness. It's the difference between generic hot cocoa and something that tastes like pure chocolate
- Sugar, 1 tbsp, adjust to taste: Start with 1 tablespoon and taste before adding more. Some of your guests may want it sweeter
- Salt, a pinch: This tiny amount amplifies the chocolate flavor in a way that seems like magic. Don't skip it
- Vanilla extract, 1/2 tsp: Added after heat so it doesn't burn off, vanilla brings out the chocolate's complexity
- Whipped cream, for serving, optional: If you make it, make it fresh. The difference between homemade and store-bought is more noticeable here than you'd expect
- Shaved chocolate, for garnish, optional: Use a vegetable peeler on room-temperature chocolate for ribbons that actually look elegant
Tired of Takeout? 🥡
Get 10 meals you can make faster than delivery arrives. Seriously.
One email. No spam. Unsubscribe anytime.
Instructions
- Gather your board and your ingredients:
- Pull everything out and let it sit at room temperature for a few minutes. Cold cheese is tight and closed-off; room temperature cheese is generous and welcoming. Use a large wooden board if you have one—it's not pretentious, it's actually practical. The wood keeps the cheeses from sweating and gives you a warm, inviting canvas to work with.
- Build your cheese foundation:
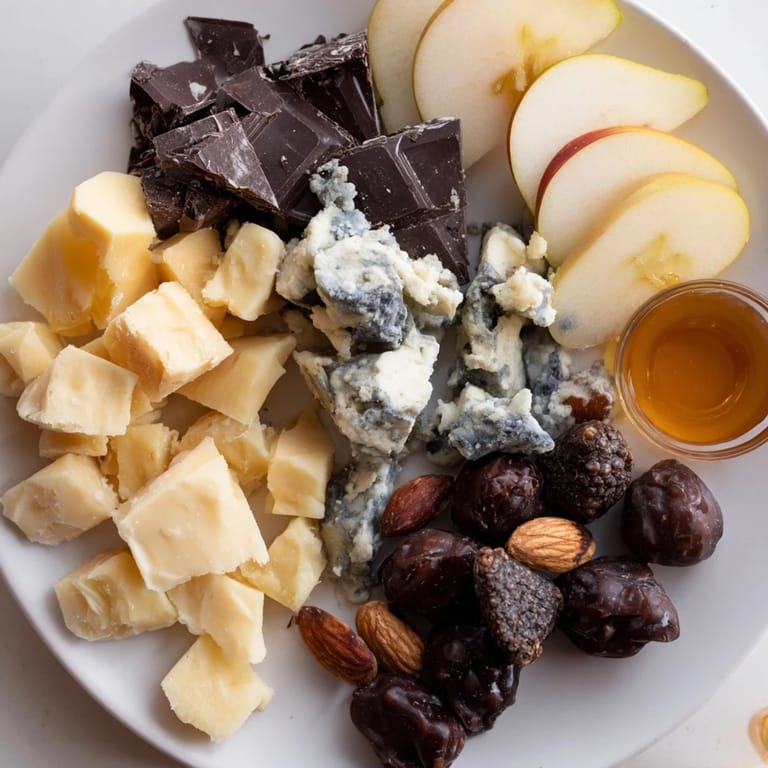
- Arrange the cheddar, gouda, and blue cheese first, leaving breathing room between them. You're not trying to fill every inch—you're creating a landscape. Keep the chunks rough and irregular. The uneven edges catch light and make everything look more abundant than it actually is. Leave small gaps so people can actually grab a piece without dismantling the whole board.
- Scatter the chocolate treasures:
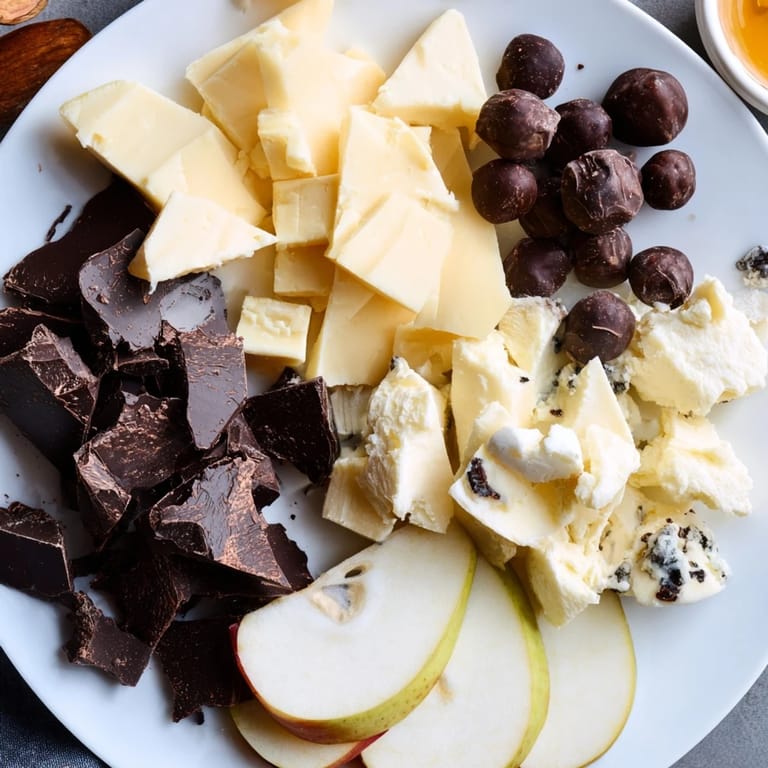
- Now add your dark chocolate pieces, chocolate-covered almonds, chocolate-dipped figs, and truffles. Think of this like painting—cluster similar colors together, then use contrasts. The dark chocolate pieces should have some distance from each other so they don't look like a chocolate bar melted across the board. The truffles are your jewels; place them somewhere they'll catch someone's eye and make them smile.
- Fill the remaining spaces thoughtfully:
- Tuck the baguette slices, nuts, and fruit around everything. The pear and apple slices should curve naturally across the board. This is where you slow down and really look at what you've created. You want someone picking up this board to feel invited, not confused. If something looks lonely, nudge things closer. If it looks crowded, take something out.
- Make the honey moment:
- Pour honey into a small bowl and place it somewhere accessible—maybe near the blue cheese or cheddar. This isn't decoration; this is a flavor experience waiting to happen. Some people won't use it. Others will discover that blue cheese and honey is their new favorite combination.
- Heat your milk gently:
- Pour the milk into a saucepan and place it over medium heat. You're listening for the moment it starts to steam—when you see wisps rising from the surface and tiny bubbles forming around the edges. Don't let it boil. Boiling milk tastes different, flatter somehow. Once it's steaming, you're ready.
- Create chocolate magic:
- Add the chopped dark chocolate, cocoa powder, sugar, and salt to the hot milk. Let it sit for about 30 seconds—this pause lets the heat start melting the chocolate. Then whisk, slowly at first so you don't splash, then faster as the chocolate begins to dissolve. Keep whisking for about a minute until there are no visible chocolate chunks and the mixture is glossy and smooth. This is the moment it stops being ingredients and becomes something wonderful.
- Finish with restraint:
- Remove the saucepan from heat. Stir in the vanilla extract—this is the final note, like a musician pulling back to let one clear note ring out. Don't skip it. The vanilla won't change the flavor you can identify, but it will change how the chocolate tastes.
- Pour and present:
- Pour the hot cocoa into mugs—ceramic ones that will feel warm and comforting in people's hands. If you're using whipped cream, add it now while the cocoa is hot so it melts slightly into the drink. Use a vegetable peeler to add shaved chocolate on top if you want to, but honestly, the cocoa is already perfect without garnish. Bring the mugs and the board to the table together, and watch what happens when people realize they can have cheese, chocolate, and hot cocoa all at once.
 Pin It
 The real moment came when my friend Marcus—who usually just drinks black coffee and makes fun of anything sweet—sat by the fire with a mug of this cocoa in one hand and a piece of blue cheese and dark chocolate in the other. He didn't say anything, just smiled in a way that suggested he was finally understanding why people talked about food with so much feeling. That's what this platter does. It doesn't just feed people. It changes the shape of an evening.
The Art of the Cheese Board
Building a cheese board is less like following a recipe and more like having a conversation with your ingredients. Every cheese needs space to breathe and a neighbor that makes it taste better. The cheddar will taste sharper next to the gouda's butter. The blue cheese will taste less funky when it's paired with something sweet. This is why arrangement matters—it's not decoration, it's flavor strategy. I've learned to spend as much time thinking about what sits next to what as I do selecting the cheeses themselves. The board that looks beautiful will also taste better.
Chocolate and Cheese, a Love Story
If I had told myself five years ago that one of my favorite food combinations would be dark chocolate and aged cheese, I would have laughed. But then I tried it—really tried it, with intention—and suddenly it made perfect sense. The cocoa in the chocolate amplifies the umami in aged cheese. The salt in cheese makes chocolate taste even more chocolatey. This isn't a weird pairing; this is how ingredients are actually supposed to work together. Once you see it, you can't unsee it, and you start noticing these harmonies everywhere in cooking.
From Simple Ingredients to Ceremony
The beautiful thing about this platter is that nothing on it requires advanced cooking skills or special equipment. You're not making anything complicated. You're arranging. You're heating milk. And somehow, the sum is greater than the parts. That's the secret that took me years to understand—that cooking isn't always about technique. Sometimes it's about intention. Sometimes it's about slowing down enough to notice that a simple board of cheese and chocolate, served with hot cocoa by a fire, is actually a kind of hospitality that matters more than anything fancy ever could.
- Quality matters more than quantity—five really good cheeses beat ten mediocre ones every time
- Serve everything at the right temperature: cheese at room temperature, chocolate pieces at room temperature, cocoa hot enough to steam
- Don't be precious about this. The most beautiful boards are the ones that look like they came together naturally, not the ones that look like they took three hours to arrange
 Pin It
 Make this when you want an evening to feel intentional and special without spending your entire day cooking. Make it when you have people you actually want to sit with and talk to, because that's what this meal is really for—it's the reason you gather at all.
Recipe FAQs
- → What cheeses work best for this platter?
Aged cheddar, gouda, and blue cheese provide a variety of sharp, creamy, and tangy flavors perfect for balance with the sweets.
- → Can I substitute gluten-free bread in the platter?
Yes, gluten-free bread or crackers can be used to keep the platter suitable for gluten-sensitive guests without compromising taste.
- → How is the hot cocoa prepared?
Heat milk gently, melt in dark chocolate, cocoa powder, sugar, and salt, then stir in vanilla for a smooth, rich cocoa.
- → What nuts are recommended for the board?
Roasted walnuts or pecans add a delightful crunch and complement both the cheeses and chocolate elements.
- → Are there any suggested pairings with this spread?
A full-bodied red wine or a rich port wine enhances the flavors and adds a sophisticated touch to the experience.
- → Can I add other dried fruits?
Dried cherries, figs, or apricots can increase sweetness and variety, harmonizing well with the chocolate and cheese.